

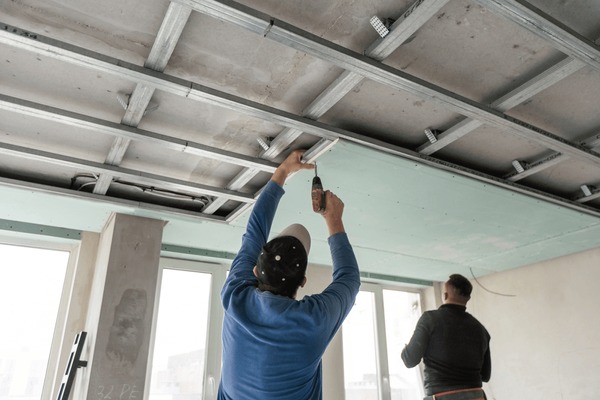
Installing a False Ceiling: A Complete Guide to Design, Materials and Installation
Have you ever entered a beautifully designed room and noticed how the ceiling makes the entire space feel more luxurious, comfortable and complete? That transformation often begins with installing a false ceiling.
A false ceiling is more than a decorative layer beneath the original ceiling. It can conceal electrical wiring, accommodate lighting fixtures, create visual depth and bring the entire interior design together. Whether you are renovating an apartment, designing a new home or upgrading a living room, the right false ceiling design for home can make a noticeable difference to the finished space.
However, choosing an attractive design is only the beginning. Material selection, ceiling height, structural support, electrical planning, lighting placement and finishing quality all influence the final result.
So, how do you choose the right ceiling, understand the installation process and avoid costly mistakes?
In this guide, Decorid explains everything homeowners should know before starting a false ceiling installation, from selecting gypsum or POP to planning modern lighting and preparing a realistic project budget.
What Is a False Ceiling and Why Is It Installed?
A false ceiling, also called a suspended ceiling or drop ceiling, is a secondary ceiling installed below the original structural ceiling. It is generally supported by a suitable framework and finished with materials such as gypsum boards, plaster of Paris (POP) or other ceiling panels.
The space between the original ceiling and the new surface can accommodate selected electrical conduits, lighting components and other building services when properly planned.
Here is why homeowners choose modern false ceiling designs:
- Improved aesthetics: Create clean lines, layered designs, geometric patterns and decorative ceiling details.
- Concealed wiring: Hide suitable electrical cables and service routes for a cleaner interior appearance.
- Better lighting integration: Incorporate recessed lights, LED strips, spotlights and indirect lighting.
- Visual zoning: Distinguish a living area, dining space or bedroom without adding physical partitions.
- A more uniform finish: Cover certain surface irregularities in the original ceiling when the underlying conditions permit.
A false ceiling does not automatically provide soundproofing, waterproofing or significant thermal insulation. These benefits depend on the materials, assembly and design specifications selected for the project.
If you are planning several upgrades together, explore Decorid’s interior execution services to understand how ceiling work can be coordinated with lighting, electrical installations, painting and other interior finishing requirements.
Types of False Ceilings: Which Material Should You Choose?
One of the most important decisions before installing a false ceiling is selecting the appropriate material. The right choice depends on the room, design complexity, moisture exposure, maintenance needs and budget.
1. Gypsum False Ceiling
A gypsum false ceiling is a popular choice for contemporary residential interiors. Gypsum boards are fixed to a suitable metal framework, and the joints are treated to create a smooth, continuous surface.
Why homeowners choose gypsum:
- Suitable for many modern living room and bedroom designs.
- Creates a clean surface for minimal and layered ceiling layouts.
- Works well with recessed lighting and concealed LED strips.
- Can provide a relatively quick, dry installation process when compared with traditional wet-applied finishing methods.
Gypsum boards are available in different specifications. Ordinary boards should not be used indiscriminately in damp areas; moisture-resistant or other purpose-designed systems may be necessary depending on the conditions.
Best suited for: Contemporary apartments, bedrooms, living rooms and interiors featuring clean architectural lines.
2. POP False Ceiling
A POP false ceiling, made using plaster of Paris, offers considerable flexibility for decorative detailing and custom shapes.
POP can be used to create curved elements, cornices, mouldings and ornamental ceiling designs that complement traditional or elaborate interiors.
Its advantages include:
- Flexibility for custom decorative shapes.
- Seamless-looking finishes when executed properly.
- Scope for detailed patterns and ornamental features.
- Compatibility with selected cove-lighting designs.
However, POP work requires skilled application, appropriate reinforcement and sufficient drying time. Poor workmanship or movement in the structure can cause cracks, while moisture can damage the finish.
Best suited for: Decorative living rooms, traditional interiors, customised ceiling details and projects requiring intricate shapes.
3. PVC False Ceiling
PVC ceiling panels are another option for selected residential and utility applications.
They are relatively easy to clean and can be useful in certain areas where moisture resistance is important. However, the actual suitability depends on the panel specification, heat exposure, fire-performance requirements and installation conditions.
Best suited for: Selected utility spaces, covered areas and other applications where the specified panel system is appropriate.
4. Wooden and Decorative False Ceilings
Wooden ceiling panels, veneer finishes and decorative slatted designs can introduce warmth and texture to an interior.
They may be used as full ceiling treatments or as accent features combined with simpler ceiling surfaces. Before selecting a wooden finish, consider the material’s durability, maintenance, moisture sensitivity, fire-performance requirements and total installation cost.
Best suited for: Premium living rooms, feature ceilings, contemporary interiors and spaces where natural textures are a design priority.
Gypsum vs POP vs PVC: A Quick Comparison
| Feature | Gypsum | POP | PVC |
|---|---|---|---|
| Design style | Clean, modern | Decorative, custom-shaped | Panel-based |
| Installation | Generally dry and relatively quick | Wet-applied and finishing-intensive | Panel installation |
| Lighting integration | Excellent with planning | Excellent with planning | Depends on panel and support system |
| Moisture suitability | Depends on board specification | Generally unsuitable for persistent dampness | Depends on product specification |
| Maintenance | Access and repair depend on design | Repairs may require patching and refinishing | Individual panels may be replaceable |
| Typical use | Living rooms and bedrooms | Decorative residential interiors | Selected utility and moisture-exposed applications |
Which should you choose? Gypsum is often a practical starting point for a clean, modern home interior. POP is worth considering for intricate decorative work, while PVC may suit specific applications where its product specifications meet the project’s requirements.
The best material is the one that fits the room’s conditions, the approved design and your long-term maintenance expectations.
How to Install a False Ceiling: Step-by-Step Process
A successful false ceiling installation begins well before the first board or panel is fixed. Careful planning reduces rework, improves finishing quality and helps coordinate different trades.
Step 1: Inspect the Existing Ceiling
Begin by assessing the original ceiling, available height, surface condition and any signs of leakage or structural damage.
Identify the position of electrical wiring, air-conditioning ducts, plumbing lines and other services that may pass above the proposed ceiling. Any active leakage or underlying defect should be addressed before the new ceiling is installed.
Step 2: Finalise the Design and Ceiling Height
Choose a suitable false ceiling design for home based on the room’s dimensions, furniture arrangement, lighting needs and interior style.
A simple perimeter design may suit a compact room, while a larger living area might accommodate a more detailed layout.
Determine the required drop from the original ceiling. The design should leave adequate clear headroom and sufficient space for the selected framework, lighting and other services. Avoid lowering the ceiling more than necessary, particularly in rooms that already have limited height.
Step 3: Select Materials and Framework
Choose the ceiling material and supporting system according to the approved design and the manufacturer’s specifications.
For a gypsum ceiling, the metal framework, hangers, fasteners and board thickness must be suitable for the span and installation conditions.
For POP, the supporting framework and reinforcement must be appropriate for the proposed shape and finish. Heavy light fixtures, fans and other loads must be supported by suitable structural provisions rather than relying on the ceiling board alone.
Step 4: Coordinate Electrical and Other Services
This is one of the most important stages of installing a false ceiling. Before the framework and boards conceal the ceiling cavity, coordinate electrical wiring, lighting points, drivers, air-conditioning services and any other required installations.
Confirm the locations of recessed lights, LED strips, access panels and other fittings. Electrical work should be completed and appropriately checked before the ceiling is closed. Planning these details early prevents unnecessary cutting, repair work and disruption after the ceiling is finished.
Step 5: Install the Framework
The supporting framework is positioned and secured using suitable anchors, hangers and connection methods. The installation team checks alignment, level, spacing and support requirements according to the selected system.
Incorrect framework spacing, inadequate anchoring or insufficient support can lead to sagging, movement or cracking. This is why accurate measurement and appropriate workmanship matter as much as the visible design.
Step 6: Fix the Boards or Apply the Ceiling Material
For gypsum ceilings, boards are fixed to the framework using the specified fasteners and installation pattern.
For POP ceilings, the material is applied and shaped using the appropriate supporting system and techniques. PVC and other panel systems follow their respective manufacturer’s installation procedures.
The objective is to create a stable, even surface that matches the approved design and accommodates the planned lighting details.
Step 7: Complete Jointing and Surface Finishing
Gypsum board joints are treated, filled and finished to produce a consistent surface. POP ceilings require suitable smoothing and drying before the finishing stages.
Once the surface is ready, apply the appropriate primer and paint or other specified finish. Rushing drying times or overlooking surface preparation can result in visible joints, uneven paint, cracks or other defects.
Step 8: Install Lighting and Inspect the Finished Ceiling
Install the specified lights and complete the associated electrical work in accordance with the approved plan. Check the lighting effects, alignment, surface finish, access provisions and visible edges. Verify that all relevant electrical and building-service installations have been checked before handover.
A final inspection helps ensure that the finished ceiling looks as intended and that important functional details have not been overlooked.
False Ceiling Design Ideas for Different Rooms
A well-designed ceiling should complement the way a room is used rather than simply add decoration.
Living Room False Ceiling
The living room is often the best place to introduce a distinctive ceiling design because it brings together seating, entertainment and social activities.
A living room false ceiling may feature a simple tray layout, perimeter cove lighting or a restrained geometric pattern.
For a compact living room, clean lines and limited decorative elements can help the space feel more open. In a larger room, layered details may help define the seating or dining zone. Consider coordinating the ceiling with the TV unit, curtains, wall colours and other major design elements.
Bedroom False Ceiling
A thoughtful bedroom false ceiling design should support a calm, comfortable atmosphere. Simple perimeter ceilings, warm indirect lighting and carefully positioned spotlights can complement bedside furniture and wardrobe layouts.
Avoid excessive brightness or complicated detailing if your priority is a relaxed bedroom environment. Lighting controls should also be planned around how the room will be used.
Kitchen False Ceiling
Kitchen ceilings require careful coordination with exhaust systems, electrical installations, lighting and available headroom.
Select materials and finishes appropriate to the actual moisture, heat and cleaning conditions. Access to concealed services should be considered before the ceiling is closed.
Hallway and Dining Area
A simple ceiling detail can visually distinguish a dining area or corridor without requiring additional partitions. Linear lighting, restrained geometric elements and consistent finishes can create continuity between adjoining spaces.
The key is to use ceiling design to support the overall layout rather than make every room compete for attention.
False Ceiling with LED Lights: What Should You Plan?
A false ceiling with LED lights can transform the appearance of a room, but the result depends on more than the number of fixtures.
Different lighting types serve different purposes:
Cove lighting: Concealed LED strips create indirect illumination along a ceiling recess or perimeter.
Recessed spotlights: These provide focused or general illumination, depending on the beam angle and placement.
LED profiles: Linear lighting can emphasise architectural lines and create a contemporary look.
Decorative pendant lights: These can act as a focal point above dining tables or other suitable areas when the ceiling structure and support are planned correctly.
Before installation, consider the following:
- Brightness: Select appropriate light output for the room’s size and purpose.
- Colour temperature: Warm white can create a relaxed atmosphere, while neutral or cooler white may suit particular functional spaces.
- Glare: Position fixtures to avoid uncomfortable direct light and distracting reflections.
- Maintenance: Ensure that drivers, connections and replaceable components can be accessed where required.
- Electrical safety: Use suitable products and qualified electrical professionals.
Lighting should be finalised during the design stage. Adding fixtures after the ceiling has been completed can involve extra labour, cutting and repainting.
How Much Does False Ceiling Installation Cost?
The false ceiling installation cost depends on the ceiling area, material, design complexity, labour, framework, lighting and site conditions. A simple flat ceiling usually requires less work than a multi-level design with curves, decorative mouldings and concealed lighting.
The following factors have a direct influence on the overall budget:
Ceiling material: Gypsum, POP, PVC and decorative finishes have different material and labour requirements.
Design complexity: Curved shapes, multiple levels, custom detailing and intricate finishing increase the amount of work involved.
Room dimensions: Ceiling area, height, access and the condition of the existing structure affect installation requirements.
Lighting and electrical work: LED strips, recessed fixtures, drivers, wiring and additional electrical points may need separate costing.
Finishing requirements: Jointing, surface preparation, primer, paint and decorative finishes can influence the final price.
Site preparation: Moving existing fittings, repairing defects or coordinating other trades may add to the project cost.
Rather than relying on a generic per-square-foot estimate, request a detailed quotation based on the actual site and approved design. Check whether the price includes materials, framework, labour, finishing, painting, lighting and applicable taxes. This makes it easier to compare quotations fairly and understand what you are paying for.
Common False Ceiling Installation Mistakes to Avoid
Even an attractive design can disappoint if important technical details are ignored.
1. Ignoring Ceiling Height
An elaborate design may look impressive in a photograph but feel uncomfortable in a low-ceilinged room. Measure the available height and plan the finished ceiling level before approving the design.
2. Choosing Materials Without Considering Moisture
Leaks, dampness and unsuitable materials can damage the finished ceiling. Resolve underlying moisture problems first, then choose a system designed for the room’s actual conditions.
3. Planning Lighting Too Late
Poor coordination can lead to misplaced fixtures, visible cables or expensive alterations. Finalise lighting positions, electrical requirements and access provisions before the ceiling is closed.
4. Compromising on Framework Quality
Inadequate anchoring or incorrect framework spacing can cause movement, sagging and cracks. Ensure the supporting system is installed according to the manufacturer’s specifications and the project’s requirements.
5. Forgetting Future Access
Some concealed services may require inspection or maintenance later. Where necessary, plan discreet access panels so that important components can be reached without damaging the finished ceiling.
6. Selecting a Design That Does Not Match the Room
Too many layers, colours or decorative elements can overwhelm a compact interior. Choose a design that complements the room’s proportions, furniture and lighting rather than following a trend without considering the space.
Why Choose Decorid for False Ceiling Installation?
A successful ceiling project requires more than a good-looking design. It needs accurate planning, suitable material selection, coordination between trades and attention to finishing details.
Decorid’s interior execution services cover false ceiling and lighting alongside electrical work, painting, modular furniture and other interior requirements.
For homeowners planning a broader upgrade, Decorid also offers home renovation services, allowing ceiling work to be considered as part of the overall interior improvement.
The process should begin with understanding the space, discussing design preferences, selecting appropriate materials and agreeing on the execution scope.
Before work starts, clarify the ceiling dimensions, design drawings, material specifications, lighting requirements, quotation inclusions and expected project schedule. These steps help establish clear expectations and make it easier to coordinate the work from planning through final handover.
Final Thoughts: Plan Your False Ceiling Before You Start
Installing a false ceiling is an opportunity to improve the appearance, lighting and overall finish of your home. But the best result comes from balancing visual appeal with practical requirements.
Start by assessing the available ceiling height, choosing a suitable material and finalising the lighting plan. Then ensure that the framework, electrical work, finishing and access provisions are properly coordinated.
Whether you prefer a minimalist gypsum ceiling, a decorative POP design or a contemporary ceiling with concealed LED lighting, thoughtful planning can help you avoid unnecessary expense and achieve a more cohesive interior.
Ready to upgrade your home? Explore Decorid’s interior execution services and discuss your false ceiling requirements with the team.
Frequently Asked Questions
1. How long does it take to install a false ceiling?
The timeline depends on the room size, ceiling material, design complexity, drying requirements and coordination with other trades. A straightforward gypsum ceiling may take a few days, while intricate POP designs or larger projects can take longer. Ask for a project-specific schedule before work begins.
2. Which is better for a home: gypsum or POP false ceiling?
Gypsum is often suitable for clean, modern ceiling designs and relatively quick installation. POP offers flexibility for curves, mouldings and decorative details. The right choice depends on the design, room conditions, budget and workmanship required.
3. What is the cost of false ceiling installation per square foot?
The cost varies with the material, framework, labour, design complexity, finishing and location. Lighting, painting and electrical work may be charged separately. Request an itemised quotation based on the measured ceiling area and the complete project specification.
4. Can LED lights be installed in a false ceiling?
Yes. False ceilings can accommodate suitable recessed lights, LED strips, cove lighting and other fixtures when the design and supporting system are planned accordingly. Electrical requirements, heat management, driver access and safe installation should be considered before the ceiling is closed.
5. Is a false ceiling suitable for every room?
Not necessarily. Suitability depends on available height, moisture exposure, ventilation, building services and the intended use of the room. A false ceiling can work well in many living rooms and bedrooms, while kitchens, bathrooms and other damp areas require more careful material selection and technical planning.
Add a comment